Workspace tour
Atlas Studio separates the editable recipe for a world from the terrain it eventually writes. Most iteration happens in the docked workspace; project management and mask painting open focused secondary windows.
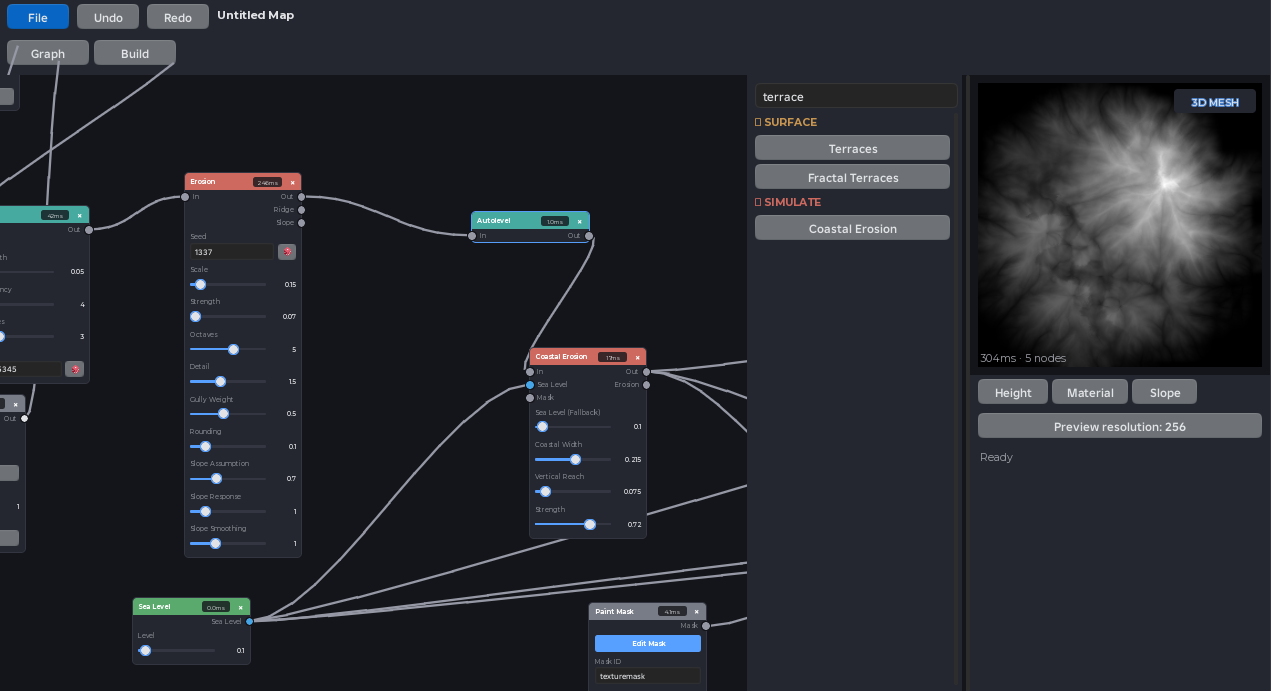
Top bar
- File opens the Map Explorer, where you create, switch, duplicate, rename, and delete Atlas projects stored in the place.
- Undo and Redo participate in Studio's change history. A completed node drag, parameter gesture, wire change, or paint stroke is one step.
- The active project name identifies which graph and settings you are editing.
Graph tab
The graph canvas holds generators, modifiers, simulations, masks, material rules, and the hidden system nodes that define previews and builds. Search the palette, select a node to add it, then wire compatible sockets from outputs to inputs.
Only the branch needed by the requested preview or build is evaluated. Evaluation-time badges on expensive nodes help identify slow sections of a graph.
Preview panel
The right panel displays the requested Height, Material, or Slope channel. Toggle 3D Mesh to judge silhouette and physical proportions instead of only reading a flat image. Preview resolution controls interactive detail, not final terrain density.
Build tab
The Build tab contains map bounds, preview resolution, terrain recipes, environment settings, and the final Build Terrain action. Start with small dimensions while designing; final builds always sample once per 4-stud terrain voxel.
Build Terrain clears all of Workspace.Terrain before writing the active map. Save the place or back up terrain you need to keep.
Next, create your first map or learn the graph controls in detail.